Friday, October 28, 2011

Tutorial: Last Minute Trick-Or-Treat Tote

Abbey wants nothing to do with dressing up for Halloween this year. Hooray for 2-ness! We have a huge bag of hand-me-down costumes, and so far we've gotten her to put on one, for a few minutes. I think the costume of choice this year is going to be whatever we can get her to put on for long enough to take pictures! haha!
I had plans for a homemade costume, but between the tightness of our budget and the pickiness of our toddler, that didn't happen. However, I didn't want Halloween to pass without something homemade, so I got to thinking.  Since the quiet book, I have a serious love for felt. It's cheap, it comes in a million colors, and it doesn't fray! LOVE!
I dug through my basket of felt, and found an orange piece and a green piece. Perfect for a pumpkin! 

While I am totally OK with Abbey going trick-or-treating, I am not OK with a huge candy stash because, let's face it, I'm going to eat most of it anyway. That and a small treat bag self-limits the trick-or-treating.
 "Oh, the bag is full? Time to go home!"
This bag is just big enough to hold a good size stash, and just small enough to take us up and down the street...once.
Here's how I did it:

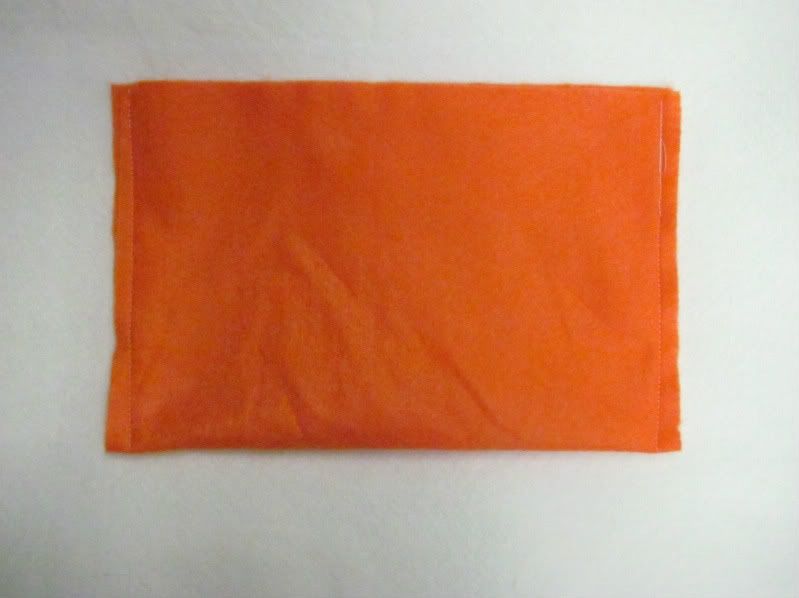
I started out by folding my orange piece of felt in half, and stitching up the sides.
This picture should be horizontal. Blogger has decided it needs to be vertical.
Thanks for that.

Then I turned my pocket into a boxy-bag (yes, that is the technical term) by sewing up the corners.
If you don't know how to do this, its super easy. Simply fold your corners, and sew a line perpendicular to your seam. The further in you go, the "boxier" your bag will be. Mine are about an inch in.

That left me with this:

Now I cut out some leaves. I just folded my green felt in half and used my rotary cutter to cut out some leaf type shapes along the edges.

These then got pinned around the edge of the bag like so:
Complicated, I know. I'm really pushing the boundaries of sewing technique here.

I stitched around the top of the bag, and added a little handle.
Voila! An adorable trick-or-treat tote!

Is it perfect? Nope. Is it going to get used for anything other than play time after Monday night? Nope! 
This bag took me maaaybe 20 minutes, including stopping and taking pictures. I love projects like this! Who doesn't love a little instant gratification, huh?

Happy Halloween, everyone! Stay safe!

This project is linked up at Tatertots and Jello,I Heart Naptime, and Boerman Ramblings


Tuesday, October 25, 2011

The Quiet Book

I am so excited to be sharing this project! This has been a dreamed about project for months, and I finally pulled together the motivation to put it all together! It's amazing what an impending 7 hour car ride will do for you! I think was intimidated by all the prep work, but I ended up finishing the book in a matter of hours, spread out over about a week. I could have done it in a weekend, if I really focused. 

So, without further ado, I present to you....

The Quiet Book


If I could do any page over, it would be this one. The letters were difficult to sew, and some just didn't hold their shape. I think I would use fusible interfacing instead. But, Abbey can still match the letters up, so that's what matters, right? The storage pocket was super simple. I just cut a rough square out, cut it into two pieces, and overlapped them when I stitched it on. It acts like a little envelope, and is perfect!


Abbey loves this one. Lots of fun, with a dash of copyright infringement thrown in there. All the pieces are stored in that red pocket. I thought about making this a one pager and storing all the pieces inside his body like the real toy, but I eventually plan on making more pieces, so I wanted to make sure they would all fit. I found the templates for all the pieces HERE at Oopsey Daisy. Check out the books she made, she's got some super cute pages!


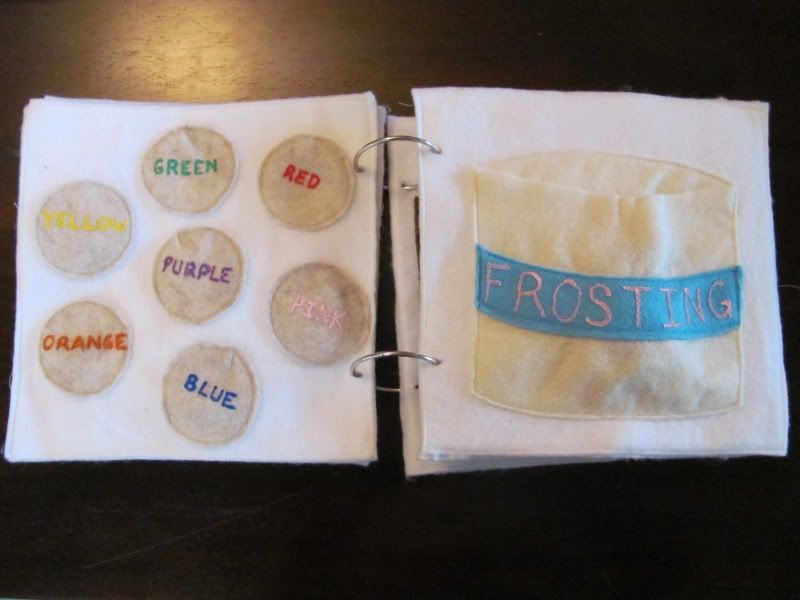
I'm so happy with the way this one turned out. Abbey knows her colors, so I wanted something just a step above simple color matching. I figured that by writing the name of the colors on each cookie, she's getting some literacy clues thrown in there. 


There is a coordinating frosting for each cookie. She can also decide if she wants them to have sprinkles or not. I'm pretty sure they always have sprinkles! No patterns for this one. I traced a cup for the cookies, and drew the can of frosting myself (I'm so proud!)


I think this page is my favorite! I got the template for the doll and the clothes HERE at Serving Pink Lemonade. She has some adorable templates! I'm planning on making the barn soon...maybe for Christmas?


How cute are those little clothes? These templates were easy to cut, and easy to sew together. Each dress and shirt are decorated on one side, and plain on the other. I like giving Abbey options. She doesn't really care about that now, but hopefully it will extend the usefulness of pages like this. 


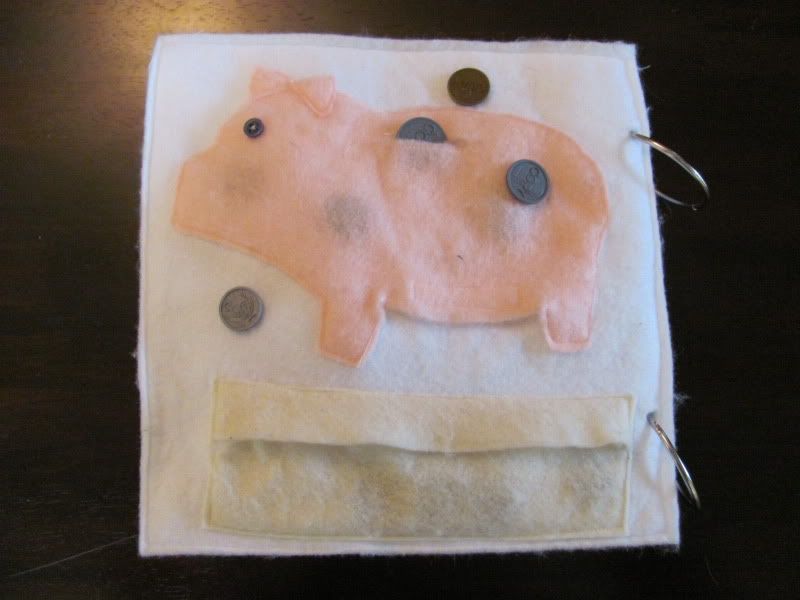
I'm so proud of this piggy bank...you have no idea! I drew him myself, which took several tries. He's got a button hole on top, and a velcro strip on his belly so that the money can go in and out. I also included a little pocket on the bottom. It's just like the one on the first page. He was inspired by THIS page, which I think comes from a pattern for an entire book you can purchase somewhere. It also inspired the dress-up doll's suitcase.

In case you were wondering...dollar store coins are NOT legal tender:


hahaha...really?

The Details:

I made my book out of Pellon, as recommended by Serving Pink Lemonade. This is the thick non-fusible Pellon, and I found it behind the cutting counter at JoAnn's. It's not very expensive at all. I bought several yards of it before I knew the exact details of my book.

My pages are 9x9. I wanted something that was large enough for little toddler hands, but small enough to stay on her lap in the car. This worked out perfectly!

All of my page pieces are stitched directly onto the page. My play pieces are all two pieces of felt sewn together. I liked the strength this provided. One layer of felt would probably be fine, but these can be shoved in the pockets without getting all wrinkled. I used the cheapo polyester felt from the craft store.

Everything, and I mean EVERYTHING is sewn with plain white thread. There was no way I was going to change out my thread and bobbin a bajillion times. Let's face it, I wanted this book to actually get done. I was worried that it would bother me, but since everything is edged in white, it all looks pretty uniform.

My pages are sewn together back to back. I like this because when Abbey out grows a certain set of pages, I  can just un-pick the seams and replace it with a new page. This also allowed me to sew my pieces directly to the page. I'm sure you could get more bang for your buck and use fabric glue, allowing you to use both sides of your page, but Pellon is pretty cheap, so I wasn't worried about it. 

I chose not to use velcro. I've seen it in several quiet books, but I just thought that it would end up ultimately damaging all the felt. The pieces stick together just fine, even in the car.

I was planning on using grommets for the binder ring holes, but the Pellon is pretty tough stuff. Grommets would also prevent me from taking pages apart, which I didn't want. 

When I was choosing these pages, I was worried that they didn't leave much room for Abbey to grow. I didn't want anything too easy, but I didn't want anything over her head either. My 4 year old nephew played with this book the other weekend, and he loved it too! Hooray!

I am thrilled with the way this book turned out. It was not the massive undertaking that I thought it would be, and Abbey loves it. I have plans for more pages, so keep an eye out for those over the next few months!




Friday, October 21, 2011

2 Seam Toddler Pajama Pants

This is another one of those things that I have seen in about a million places around the internet. This is by NO means an original idea, just another tutorial to add to the growing list out there!

Abbey hasn't completely mastered the whole sleeping-under-the-blanket thing yet, so I wanted to make sure that she has some nice snugly pajama pants to help keep her warm. I thought about buying her some, but seriously...fleece jammies are expensive, yo! (yep...that just happened.)
On one of my recent Goodwill trips, I found some great adult sized fleece pajama pants for, like, $3. I remembered those millions of pajama tutorials and thought to myself, "I can totally do that!".
A tip before you start: I HIGHLY recommend using a walking foot for this project. This is actually the second pair I've made, and it was sooo much easier with the walking foot than my regular presser foot. Fleece is thick, and can be tricky to push though. The first pair is fine...if you don't look too closely at the seams!

Here's how I did it:

Fold the original fleece jammies in half, making sure the edges and hems are lined up. Take a pair of jammies that fit well, fold them in half and line them up along the seams. This pair was getting a bit short, so I left some extra length at the top. The piece of elastic at the top is a reminder to leave room for the band.


Cut along the edge of your pattern jammies, making sure to leave enough room for your seam allowance.

Now you have both legs for your jammies!
Disclaimer: Yes, I know that typically pant legs are measured differently from front to back. If these were pants for wearing outside, I would have done things right, but these are jammies...so it's all good!

Now pin your two legs together along the crotch (does anyone else hate that word?) seams, and sew them together. JUST the curved seams, not the legs!

Once you've sewn the curved seams, pin your leg seams together so that you have each pant leg separated. I forgot to take a picture of that step, but I think you'll be OK! I have faith in you!
Sew up one leg, over the crotch (twitch!) seam and back down the other leg.

Now all that's left is to create the waistband. Using your elastic as a guide, fold the top of your pants over, and sew almost all the way around. Make sure you leave room to insert your elastic.

Thread your elastic through the tube and sew it together with a flat seam.

Tuck your elastic in, and stitch up the rest of the waistband.


There you have it...you're done! 2 seams, no hemming...easy peasy! My favorite part of this pair is that the hems on the original pants had some cute detailing, that I probably wouldn't have taken the time to add on my own. Love it!

Don't they look comfy??


This project is linked up at Fingerprints on the Fridge, Tatertots and Jello, and The Girl Creative. Go Check them out!


Tuesday, October 18, 2011

Fall Leaf Art

I love that Abbey is at the age that we can start doing arts and crafts together. I love it even more when said arts and crafts are free! Our neighborhood is absolutely loaded with all sorts of pretty leaves right now, so I decided to take advantage and do some leaf art.
See? Isn't that pretty? How cute are those little baby maple leaves?!

This project could NOT be any easier. 
We picked up some leaves on our way home from the park. It gave Abbey a nice distraction since she was not happy about going home. Bonus!

We started out with some glue. Abbey spread some glue onto her paper, and then I went back and made sure there was a decent amount there so the leaves would stick.

Once the glue was on, Abbey got full creative freedom!

Can you tell she doesn't like getting her hands messy? haha!

And here it is....easy peasy!
How's that for a proud face?!


Monday, October 10, 2011

Indian Summer


Did you know that Indian Summer had an actual definition? I always thought it was just a brief warm up after the weather has started to cool down. It turns out, for it to be "officially" Indian Summer, that warm up has to occur after a freeze. See...you learned something today! Well, maybe you didn't, but I did!
(who says the news isn't worth watching anymore??)

We have had 2 weeks of absolutely glorious weather. Shorts and a t-shirt in October? in Chicago?? Awesome. I actually had to dig out clothes that I had packed away already! We have been taking full advantage of it for sure. Lots of trips to the park, and as much outside time as we can get! We've also been getting creative with all of these gorgeous leaves, so be watching for that!


I'll take it while I can, because I am not quite ready for my first Chicago winter in 5 years. They're already predicting that this year is going to be a record breaker in terms of cold and snow...great.

Tuesday, October 4, 2011

Paint Chip Matching Game


I have seen about a bajillion versions of this super simple game. We're headed up north next weekend with some family, and I wanted to come up with some fun little games that Abbey can play with her cousin, who is a year and a half older than her. We are on a seriously shoestring budget, so when I remembered this game, I knew I just had to make it! I already had clothespins, so this game was completely FREE! Woot!

 Head to the local hardware store and grab some paint chips. I used some from Behr, because I like that they were nice and wide, and I only had to grab one of each color. If you're using skinny paint chips, you'll probably want 2 of each, but it's your call.


I trimmed the rounded edges off of the paint chips, and most of the words. Some colors had really long names, so they didn't all get trimmed away...oh well! I trimmed what was left into a wide strip and a narrow strip. The narrow strip got trimmed into individual colors. These pieces were hot glued onto the clothespins.


Now it's time to play! Abbey LOVES matching all the colors! She still has a hard time pinching the clothespins, but that will improve in no time. Fine motor practice...bonus!


This game could not have been any easier to put together. And nothing beats free fun!


Monday, October 3, 2011

A trip to the orchard

We went apple picking this weekend. That is one of the things I missed most while we were in Arizona! There is seriously nothing better than a ripe apple straight off the tree. We got to spend the day with friends. Matt has known them since he was little, and their daughter is just a few months younger than Abbey. We went to Kuiper's Family Farm and had a blast! This place is adorable! There is an apple side with an orchard and a store, and a pumpkin side that had all sorts of games and run-around stuff. Unfortunately, you have to pay separately for each side and that just didn't fit into our (very small) budget. Apples it is!

First we had to figure out which way to go...

Then we headed out to pick.
Who doesn't need an apple the size of their head?

New friends are the BEST!

Could they get any cuter?! iDie!

Family photo op!!


And of course there were tractors to ride on...

and horseys too...


and the sign of a truly great day...

She slept the entire 40 minute drive home, and then for another 2+ hours once we got home!
God bless fresh air and sunshine!


Like it? Share it!

LinkWithin

Related Posts Plugin for WordPress, Blogger...