Thursday, December 22, 2011

The New Look

So, some of you may have noticed that I gave the blog a bit of a makeover last week. If you're reading this in a reader, come on over and check it out. I wanted to take a quick minute and share with you how I made everything. Yes, you read that right, I made everything by my little ol' self, with the help of two incredibly talented ladies. 

I started out with some fantastic blogwear templates by Scrapping With Liz. Aren't they fantastic??
I've been a fan of Liz's digital scrapbook templates for years, and was super excited to have the chance to test out her new set of blogwear templates! Everything is high quality, and she includes step-by-step visual instructions if you are blog design challenged like me.

You can buy these templates here and check out Liz's blog here

Then I grabbed a new Christmas kit by Tracie Stroud.
Tracie is another digital scrapbooking designer that I have loved for ages. Her kits are always beautiful, and have a great vintage-y feel to them. 
Isn't this kit adorable?

You can buy this kit here, and check out Tracie's blog here.

Then all I had to do was put it all together. I do all my scrapbooking in Photoshop Elements 7. If you're thinking about digital scrapbooking, I highly recommend PSE. You can get a 30 day free trial at the Adobe website. The whole process from beginning to end took maybe an hour or so. Seriously...it was so simple!


If you're interested in digital scrapbooking, but don't know where to start, leave me a comment and I'll hook you up with some great tutorials!

I'm so in love with Tracie's kit, I used it to make our Christmas cards, too! 
So, here it is, from us to you...

Merry Christmas!

This post is linked up at SugarBee Crafts, Boerman Ramblings and The Girl Creative

Sunday, December 18, 2011

Bakin' Cookies

So, when your tiny child points to your stand mixer and says "make!" what other choice do you have but to make cookies! We hadn't done any sugar cookies yet this year, so it seemed like a good time to bust out the cookie cutters. 

For my entire life, our go-to sugar cookie recipe has been from the Betty Crocker Cookbook. My mom has had her copy since before she got married, and let me tell you...this is one well loved cook book!

Abbey helped me with all the mixing...

Butter, sugar, eggs...

Ta-da!!

Now time for some flour...

We got a little messy. This stressed her out...she's not a fan of messy.


and of course, what's better than a little bit of dough eating?


...pause for naptime/cookie dough chillage...

Abbey also made an excellent cookie decorator (of course she did!)


This is the stuff that makes Christmas wonderful. In the midst of all the craziness, and shopping, and planning, and prepping, things like this are what keep me sane. Did the laundry get done this day? Nope. But I made cookies with my little girl.

Oh, and note to self...
Before giving the tiny child a shaker full of sprinkles, give it a test run first...
ooops!

Now, go grab your kids and bake some cookies! 
Merry Christmas!


Tuesday, December 6, 2011

Deck the Halls!

What fun is Christmas decorating if you don't get the tiny children involved, huh? Last week I decided that a nice paper chain was a perfect project for Abbey. Lots of chances to help, and nothing too complicated. Sounds like a toddler craft dream!

We started out by decorating some paper:
A little marker...

A little glitter...

A little more glitter! Who doesn't love more glitter??

Then we took a nap-time break. Well, Abbey did anyway. I like projects like this that can be split up, because it gives me some good "first a nap, then ______" motivation. It also gave me a chance to do the next step of the project without Abbey losing interest.

While she was sleeping, I cut the paper into strips using my paper cutter (God bless that thing!)
Note #1: Construction paper divides evenly into 1 1/2 inch strips
Note #2: Elmers glue sticks (the purple ones) aren't very good at holding down glitter...just sayin.

After nap time, we started putting our chain together:

Glue...

Pinch...

Glue...pinch...glue...pinch...glue...pinch...

This is a great time to work on things like color recognition, and patterns.

So proud!

It looked a bit lonely at first...

But then Noni got out the Christmas decorations:
Much better! If you can believe it, this is only about a third of what will be going up there! 
Someday I'll have a collection like that...


Monday, November 21, 2011

This is my world...


Can you guess what we're doing in our household??

How about another clue...

That's right...we're potty training! Ahh...what an adventure. We've started the process about a month ago, without much luck. Abbey would sit, and then go to the bathroom as soon as we had her back in either a diaper or training pants. Just the other week we decided to give it another go. I brought the potty chair into the family room, and just let her have access to it all day long. She spent a good 4 days without any pants on! This time it's working! She has figured out how to hold it (most of the time), and makes it to the potty 
(most of the time.) 
God bless iPads...she's going to kill me some day!

Now we're at that super awesome phase where she's not quite good enough to leave the house in underwear, but she knows she's not supposed to go in her pants. It makes for a lot of whining and some serious cases of Wiggle Butt. She's terrified of big potties, so that doesn't help. That's the next step I guess...
I'm hoping that by Christmas she'll have it down pat! How did potty training go in your house? Any tricks?

Oh! I should hopefully have a tutorial for you on making your own waterproof cloth training pants soon! I will get my act together...I will get my act together...


Friday, November 11, 2011

The To-Do List

Ahh...Pinterest. How I love you. I am proud to say that Pinterest is not just a time waster for me. I've completed several of the things I've pinned. I never could have finished Abbey's quiet book without it. However, Pinterest does seem to become my never-ending to-do list. I'm going to put some of my top projects  up here, and hopefully that accountability will keep me on my game!

Here it is...the current To-Do list:


These are for  my sweet newphew Hayden, who turns 4 next week! I need to go pick up the stuff for this this weekend! 


I'm in LOVE with this banner kit from Craftaholics Anonymous! I think it would look great on our entertainment center. Plus it comes all cut out and ready to sew (or glue!). Sounds good to me! Have you seen the new Monthly Craft Kits over at CA? They're fantastic, and they fit my budget! Woot!


I think Abbey would love this Christmas Tree. Maybe as an Advent Calendar? One new ornament every day? It totally feeds my felt addiction, too. Now...where to put it....


I WILL finally sit down and use this tutorial to make Abbey some pants. I have 2 different colors of corduroy just waiting for me. It's time to do the thing!


Finally, a little something for me. I'm loving this headband! Now if only I could get my hair to do that...

Alright...the list is out there now! Keep me going! I'll be sharing these projects as I finish them up!

Friday, November 4, 2011

Wipe-Off Handwriting Pages

Since I'm not teaching anymore, I have this big old bin of books and materials that are just sitting in the crawlspace. I taught in Special Education, and most of my students functioned in about the 2-3 age range, so I decided to haul out the box and see what Abbey might like.
I found quite a few things in there, some of which will be showing up here later, but what I want to share with you today is this:

This book is full of all sorts of pre-handwriting pages. It starts with horizontal and vertical lines, and then moves onto diagonal, wavy, zig zag and letter. Abbey knows all of her letters, but she's not quite ready to start writing them yet. This will help her build those skills.

Now, we have a copier at home, but who wants to waste all that paper and ink? I thought about page protectors, but those are so flimsy. I don't really think they'll stand up to a 2 year old. 
Then I found these at Big Lots:
They're clear plastic folders, and have a tab at the top to keep both sides together. They're sturdier than page protectors, too! Perfect for toddlers!

I printed off and blew up a few of the vertical and horizontal pages, and ended up with this:

The first time we did this, we used a dry erase marker, but we've discovered that crayons work just as well, and wipe off easily. If you don't love the idea of a toddler with a marker, stick with crayons!

Abbey loves it! She'll usually trace a few lines, and then move on to scribbles, but that's fine with me.

Total proud mommy moment: She only had help with one of these lines! On her first try!
Pretty darn good if you ask me! My daughter is a genius!

I think this one is a hit, how about you?


Friday, October 28, 2011

Tutorial: Last Minute Trick-Or-Treat Tote

Abbey wants nothing to do with dressing up for Halloween this year. Hooray for 2-ness! We have a huge bag of hand-me-down costumes, and so far we've gotten her to put on one, for a few minutes. I think the costume of choice this year is going to be whatever we can get her to put on for long enough to take pictures! haha!
I had plans for a homemade costume, but between the tightness of our budget and the pickiness of our toddler, that didn't happen. However, I didn't want Halloween to pass without something homemade, so I got to thinking.  Since the quiet book, I have a serious love for felt. It's cheap, it comes in a million colors, and it doesn't fray! LOVE!
I dug through my basket of felt, and found an orange piece and a green piece. Perfect for a pumpkin! 

While I am totally OK with Abbey going trick-or-treating, I am not OK with a huge candy stash because, let's face it, I'm going to eat most of it anyway. That and a small treat bag self-limits the trick-or-treating.
 "Oh, the bag is full? Time to go home!"
This bag is just big enough to hold a good size stash, and just small enough to take us up and down the street...once.
Here's how I did it:

I started out by folding my orange piece of felt in half, and stitching up the sides.
This picture should be horizontal. Blogger has decided it needs to be vertical.
Thanks for that.

Then I turned my pocket into a boxy-bag (yes, that is the technical term) by sewing up the corners.
If you don't know how to do this, its super easy. Simply fold your corners, and sew a line perpendicular to your seam. The further in you go, the "boxier" your bag will be. Mine are about an inch in.

That left me with this:

Now I cut out some leaves. I just folded my green felt in half and used my rotary cutter to cut out some leaf type shapes along the edges.

These then got pinned around the edge of the bag like so:
Complicated, I know. I'm really pushing the boundaries of sewing technique here.

I stitched around the top of the bag, and added a little handle.
Voila! An adorable trick-or-treat tote!

Is it perfect? Nope. Is it going to get used for anything other than play time after Monday night? Nope! 
This bag took me maaaybe 20 minutes, including stopping and taking pictures. I love projects like this! Who doesn't love a little instant gratification, huh?

Happy Halloween, everyone! Stay safe!

This project is linked up at Tatertots and Jello,I Heart Naptime, and Boerman Ramblings


Tuesday, October 25, 2011

The Quiet Book

I am so excited to be sharing this project! This has been a dreamed about project for months, and I finally pulled together the motivation to put it all together! It's amazing what an impending 7 hour car ride will do for you! I think was intimidated by all the prep work, but I ended up finishing the book in a matter of hours, spread out over about a week. I could have done it in a weekend, if I really focused. 

So, without further ado, I present to you....

The Quiet Book


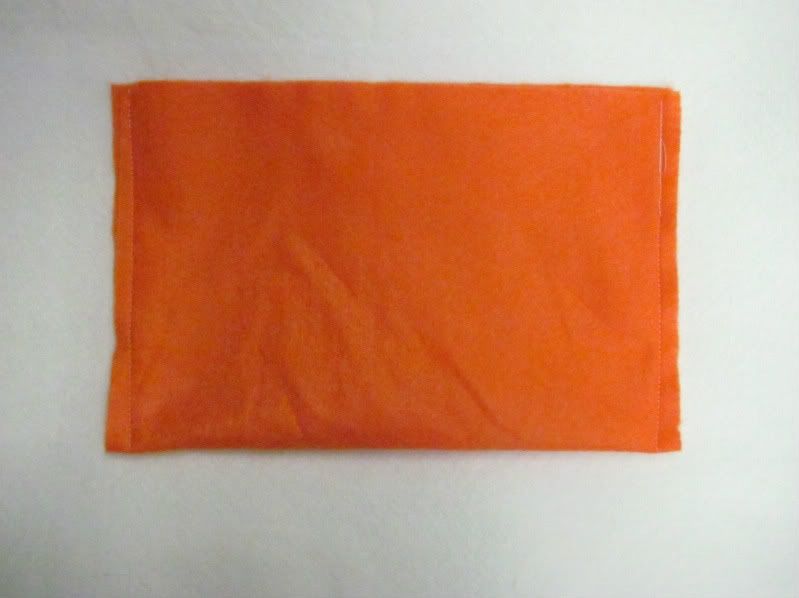
If I could do any page over, it would be this one. The letters were difficult to sew, and some just didn't hold their shape. I think I would use fusible interfacing instead. But, Abbey can still match the letters up, so that's what matters, right? The storage pocket was super simple. I just cut a rough square out, cut it into two pieces, and overlapped them when I stitched it on. It acts like a little envelope, and is perfect!


Abbey loves this one. Lots of fun, with a dash of copyright infringement thrown in there. All the pieces are stored in that red pocket. I thought about making this a one pager and storing all the pieces inside his body like the real toy, but I eventually plan on making more pieces, so I wanted to make sure they would all fit. I found the templates for all the pieces HERE at Oopsey Daisy. Check out the books she made, she's got some super cute pages!


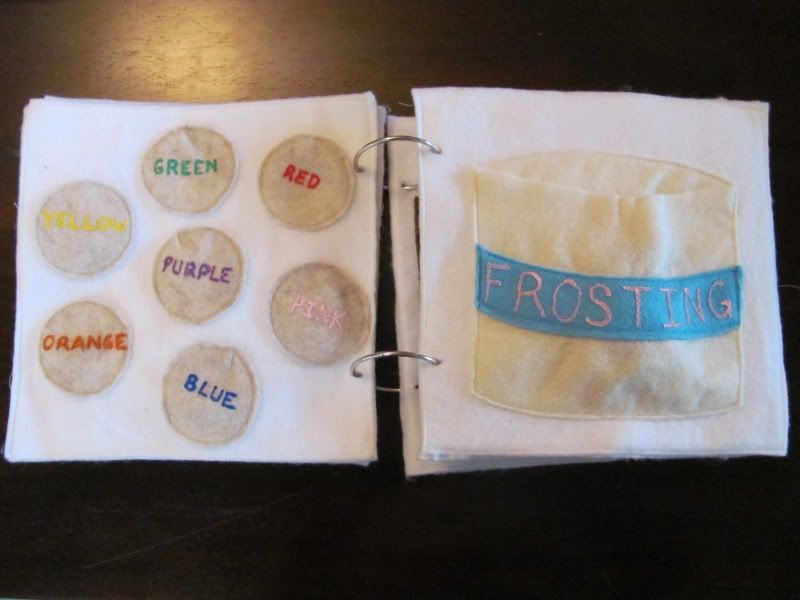
I'm so happy with the way this one turned out. Abbey knows her colors, so I wanted something just a step above simple color matching. I figured that by writing the name of the colors on each cookie, she's getting some literacy clues thrown in there. 


There is a coordinating frosting for each cookie. She can also decide if she wants them to have sprinkles or not. I'm pretty sure they always have sprinkles! No patterns for this one. I traced a cup for the cookies, and drew the can of frosting myself (I'm so proud!)


I think this page is my favorite! I got the template for the doll and the clothes HERE at Serving Pink Lemonade. She has some adorable templates! I'm planning on making the barn soon...maybe for Christmas?


How cute are those little clothes? These templates were easy to cut, and easy to sew together. Each dress and shirt are decorated on one side, and plain on the other. I like giving Abbey options. She doesn't really care about that now, but hopefully it will extend the usefulness of pages like this. 


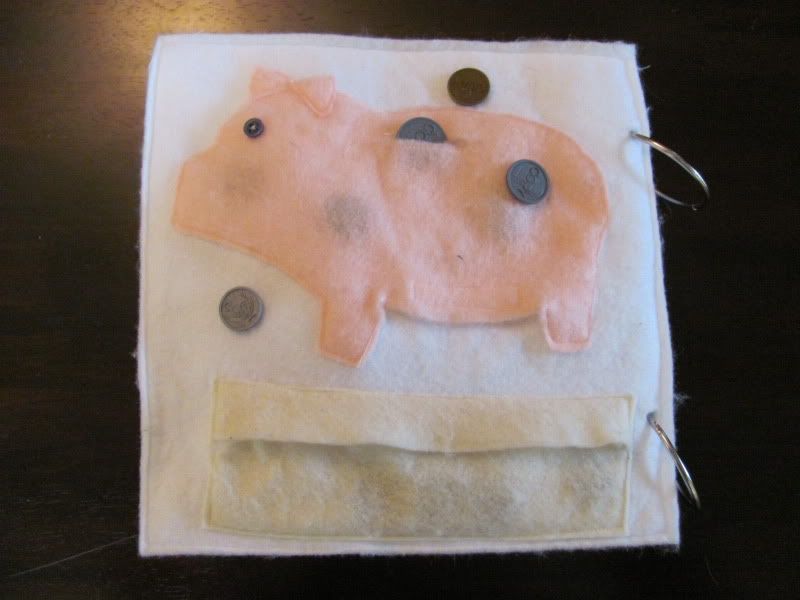
I'm so proud of this piggy bank...you have no idea! I drew him myself, which took several tries. He's got a button hole on top, and a velcro strip on his belly so that the money can go in and out. I also included a little pocket on the bottom. It's just like the one on the first page. He was inspired by THIS page, which I think comes from a pattern for an entire book you can purchase somewhere. It also inspired the dress-up doll's suitcase.

In case you were wondering...dollar store coins are NOT legal tender:


hahaha...really?

The Details:

I made my book out of Pellon, as recommended by Serving Pink Lemonade. This is the thick non-fusible Pellon, and I found it behind the cutting counter at JoAnn's. It's not very expensive at all. I bought several yards of it before I knew the exact details of my book.

My pages are 9x9. I wanted something that was large enough for little toddler hands, but small enough to stay on her lap in the car. This worked out perfectly!

All of my page pieces are stitched directly onto the page. My play pieces are all two pieces of felt sewn together. I liked the strength this provided. One layer of felt would probably be fine, but these can be shoved in the pockets without getting all wrinkled. I used the cheapo polyester felt from the craft store.

Everything, and I mean EVERYTHING is sewn with plain white thread. There was no way I was going to change out my thread and bobbin a bajillion times. Let's face it, I wanted this book to actually get done. I was worried that it would bother me, but since everything is edged in white, it all looks pretty uniform.

My pages are sewn together back to back. I like this because when Abbey out grows a certain set of pages, I  can just un-pick the seams and replace it with a new page. This also allowed me to sew my pieces directly to the page. I'm sure you could get more bang for your buck and use fabric glue, allowing you to use both sides of your page, but Pellon is pretty cheap, so I wasn't worried about it. 

I chose not to use velcro. I've seen it in several quiet books, but I just thought that it would end up ultimately damaging all the felt. The pieces stick together just fine, even in the car.

I was planning on using grommets for the binder ring holes, but the Pellon is pretty tough stuff. Grommets would also prevent me from taking pages apart, which I didn't want. 

When I was choosing these pages, I was worried that they didn't leave much room for Abbey to grow. I didn't want anything too easy, but I didn't want anything over her head either. My 4 year old nephew played with this book the other weekend, and he loved it too! Hooray!

I am thrilled with the way this book turned out. It was not the massive undertaking that I thought it would be, and Abbey loves it. I have plans for more pages, so keep an eye out for those over the next few months!


Like it? Share it!

LinkWithin

Related Posts Plugin for WordPress, Blogger...