Showing posts with label sewing. Show all posts

Saturday, January 7, 2012

Flannel Infinity Scarf


I may or may not have a extreme mild obsession with scarves. I may or may not have an entire dresser drawer full of them. I may or may not still want more. So, when I got some awesome plaid flannel from my Gram in a stash busting session in her basement (aren't grandma's the best?) I knew exactly what I was going to do with it!

I used this tutorial by The Cottage Home, and it couldn't have been easier. I've had it pinned forever and I was excited to try it out! Straight lines and a teeny bit of hand-sewing...right up my alley! My measurements weren't exactly the same as hers. My scarf isn't as wide, which is why it's not as bulky. I love this thing! It's warm and snuggly, but light enough to wear indoors all day.  It makes me feel very collegiate, maybe because it's my school's colors (GVSU! Go Lakers!)
It also happens to be perfect for 55 degree days in January and trips to the zoo!

Please ingnore the fact that I look EXHAUSTED in this picture. 

Oh, and can we stop for a second and talk about my black sequin TOMS that I got for Christmas. 
I'm pretty much in love with them!


Tuesday, January 3, 2012

Dinosaur Slippers

Are you playing along with the Pinterest Challenge?


The Pinterest Challenge

If you're not, what are you wating for?? Get on over there and link up any Pinspired project you've made in the last month. Here is what I'll be linking up...

I finally get to check something off my to-do list

                                                                       Source: made-by-rae.com via Heather on Pinterest

My nephew, Hayden, loves dinosaurs. 
I mean really...what 4 year old boy doesn't love dinosaurs?
I meant to make these slippers for his birthday in November. The pattern is by one of my FAVES, Rae from Made By Rae. The first attempt ended up WAY too small, and will probably be salvaged into slippers for Abbey. I was extra cautious about the second attempt and ended up with slippers that are probably too big, but he's 4...he'll grow!


I'm pretty proud of them! I gave them to him with a very cute pop up book I found at Barnes and Noble. One of the dinosaurs in the book is even POOPING! Bahahahaha! Dinosaur slippers and a book with a 3-D pooping dinosaur?? Little boy heaven! I was hoping to get a picture of him wearing his new slippers, but you get a 4 year old boy to hold still and pose for a picture on Christmas. Go ahead...I dare you!

Besides the Pinterest Challenge, I'm also linking up to SugarBee Crafts, The Polkadot Chair, Tatertots and Jello and Boerman Ramblings
Come play with me!


Friday, October 28, 2011

Tutorial: Last Minute Trick-Or-Treat Tote

Abbey wants nothing to do with dressing up for Halloween this year. Hooray for 2-ness! We have a huge bag of hand-me-down costumes, and so far we've gotten her to put on one, for a few minutes. I think the costume of choice this year is going to be whatever we can get her to put on for long enough to take pictures! haha!
I had plans for a homemade costume, but between the tightness of our budget and the pickiness of our toddler, that didn't happen. However, I didn't want Halloween to pass without something homemade, so I got to thinking.  Since the quiet book, I have a serious love for felt. It's cheap, it comes in a million colors, and it doesn't fray! LOVE!
I dug through my basket of felt, and found an orange piece and a green piece. Perfect for a pumpkin! 

While I am totally OK with Abbey going trick-or-treating, I am not OK with a huge candy stash because, let's face it, I'm going to eat most of it anyway. That and a small treat bag self-limits the trick-or-treating.
 "Oh, the bag is full? Time to go home!"
This bag is just big enough to hold a good size stash, and just small enough to take us up and down the street...once.
Here's how I did it:

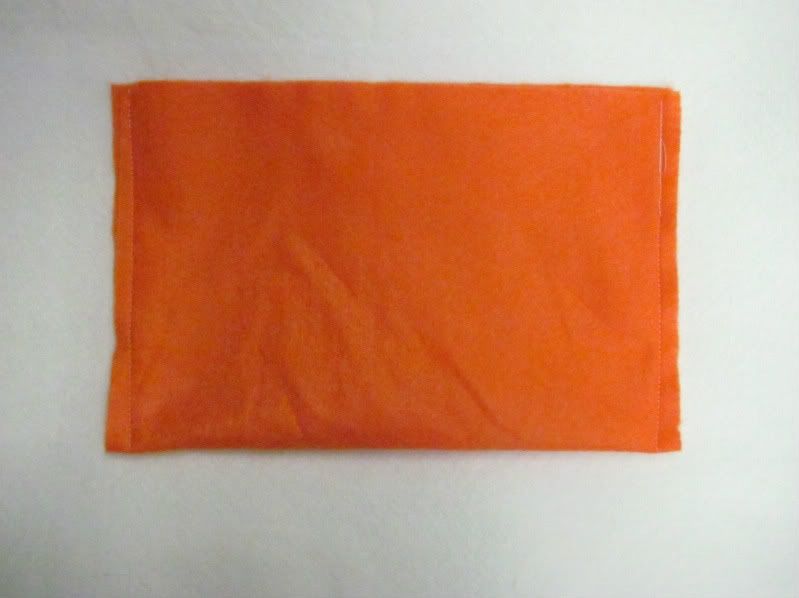
I started out by folding my orange piece of felt in half, and stitching up the sides.
This picture should be horizontal. Blogger has decided it needs to be vertical.
Thanks for that.

Then I turned my pocket into a boxy-bag (yes, that is the technical term) by sewing up the corners.
If you don't know how to do this, its super easy. Simply fold your corners, and sew a line perpendicular to your seam. The further in you go, the "boxier" your bag will be. Mine are about an inch in.

That left me with this:

Now I cut out some leaves. I just folded my green felt in half and used my rotary cutter to cut out some leaf type shapes along the edges.

These then got pinned around the edge of the bag like so:
Complicated, I know. I'm really pushing the boundaries of sewing technique here.

I stitched around the top of the bag, and added a little handle.
Voila! An adorable trick-or-treat tote!

Is it perfect? Nope. Is it going to get used for anything other than play time after Monday night? Nope! 
This bag took me maaaybe 20 minutes, including stopping and taking pictures. I love projects like this! Who doesn't love a little instant gratification, huh?

Happy Halloween, everyone! Stay safe!

This project is linked up at Tatertots and Jello,I Heart Naptime, and Boerman Ramblings


Friday, October 21, 2011

2 Seam Toddler Pajama Pants

This is another one of those things that I have seen in about a million places around the internet. This is by NO means an original idea, just another tutorial to add to the growing list out there!

Abbey hasn't completely mastered the whole sleeping-under-the-blanket thing yet, so I wanted to make sure that she has some nice snugly pajama pants to help keep her warm. I thought about buying her some, but seriously...fleece jammies are expensive, yo! (yep...that just happened.)
On one of my recent Goodwill trips, I found some great adult sized fleece pajama pants for, like, $3. I remembered those millions of pajama tutorials and thought to myself, "I can totally do that!".
A tip before you start: I HIGHLY recommend using a walking foot for this project. This is actually the second pair I've made, and it was sooo much easier with the walking foot than my regular presser foot. Fleece is thick, and can be tricky to push though. The first pair is fine...if you don't look too closely at the seams!

Here's how I did it:

Fold the original fleece jammies in half, making sure the edges and hems are lined up. Take a pair of jammies that fit well, fold them in half and line them up along the seams. This pair was getting a bit short, so I left some extra length at the top. The piece of elastic at the top is a reminder to leave room for the band.


Cut along the edge of your pattern jammies, making sure to leave enough room for your seam allowance.

Now you have both legs for your jammies!
Disclaimer: Yes, I know that typically pant legs are measured differently from front to back. If these were pants for wearing outside, I would have done things right, but these are jammies...so it's all good!

Now pin your two legs together along the crotch (does anyone else hate that word?) seams, and sew them together. JUST the curved seams, not the legs!

Once you've sewn the curved seams, pin your leg seams together so that you have each pant leg separated. I forgot to take a picture of that step, but I think you'll be OK! I have faith in you!
Sew up one leg, over the crotch (twitch!) seam and back down the other leg.

Now all that's left is to create the waistband. Using your elastic as a guide, fold the top of your pants over, and sew almost all the way around. Make sure you leave room to insert your elastic.

Thread your elastic through the tube and sew it together with a flat seam.

Tuck your elastic in, and stitch up the rest of the waistband.


There you have it...you're done! 2 seams, no hemming...easy peasy! My favorite part of this pair is that the hems on the original pants had some cute detailing, that I probably wouldn't have taken the time to add on my own. Love it!

Don't they look comfy??


This project is linked up at Fingerprints on the Fridge, Tatertots and Jello, and The Girl Creative. Go Check them out!


Like it? Share it!

LinkWithin

Related Posts Plugin for WordPress, Blogger...