Monday, November 21, 2011

This is my world...


Can you guess what we're doing in our household??

How about another clue...

That's right...we're potty training! Ahh...what an adventure. We've started the process about a month ago, without much luck. Abbey would sit, and then go to the bathroom as soon as we had her back in either a diaper or training pants. Just the other week we decided to give it another go. I brought the potty chair into the family room, and just let her have access to it all day long. She spent a good 4 days without any pants on! This time it's working! She has figured out how to hold it (most of the time), and makes it to the potty 
(most of the time.) 
God bless iPads...she's going to kill me some day!

Now we're at that super awesome phase where she's not quite good enough to leave the house in underwear, but she knows she's not supposed to go in her pants. It makes for a lot of whining and some serious cases of Wiggle Butt. She's terrified of big potties, so that doesn't help. That's the next step I guess...
I'm hoping that by Christmas she'll have it down pat! How did potty training go in your house? Any tricks?

Oh! I should hopefully have a tutorial for you on making your own waterproof cloth training pants soon! I will get my act together...I will get my act together...


Friday, November 11, 2011

The To-Do List

Ahh...Pinterest. How I love you. I am proud to say that Pinterest is not just a time waster for me. I've completed several of the things I've pinned. I never could have finished Abbey's quiet book without it. However, Pinterest does seem to become my never-ending to-do list. I'm going to put some of my top projects  up here, and hopefully that accountability will keep me on my game!

Here it is...the current To-Do list:


These are for  my sweet newphew Hayden, who turns 4 next week! I need to go pick up the stuff for this this weekend! 


I'm in LOVE with this banner kit from Craftaholics Anonymous! I think it would look great on our entertainment center. Plus it comes all cut out and ready to sew (or glue!). Sounds good to me! Have you seen the new Monthly Craft Kits over at CA? They're fantastic, and they fit my budget! Woot!


I think Abbey would love this Christmas Tree. Maybe as an Advent Calendar? One new ornament every day? It totally feeds my felt addiction, too. Now...where to put it....


I WILL finally sit down and use this tutorial to make Abbey some pants. I have 2 different colors of corduroy just waiting for me. It's time to do the thing!


Finally, a little something for me. I'm loving this headband! Now if only I could get my hair to do that...

Alright...the list is out there now! Keep me going! I'll be sharing these projects as I finish them up!

Friday, November 4, 2011

Wipe-Off Handwriting Pages

Since I'm not teaching anymore, I have this big old bin of books and materials that are just sitting in the crawlspace. I taught in Special Education, and most of my students functioned in about the 2-3 age range, so I decided to haul out the box and see what Abbey might like.
I found quite a few things in there, some of which will be showing up here later, but what I want to share with you today is this:

This book is full of all sorts of pre-handwriting pages. It starts with horizontal and vertical lines, and then moves onto diagonal, wavy, zig zag and letter. Abbey knows all of her letters, but she's not quite ready to start writing them yet. This will help her build those skills.

Now, we have a copier at home, but who wants to waste all that paper and ink? I thought about page protectors, but those are so flimsy. I don't really think they'll stand up to a 2 year old. 
Then I found these at Big Lots:
They're clear plastic folders, and have a tab at the top to keep both sides together. They're sturdier than page protectors, too! Perfect for toddlers!

I printed off and blew up a few of the vertical and horizontal pages, and ended up with this:

The first time we did this, we used a dry erase marker, but we've discovered that crayons work just as well, and wipe off easily. If you don't love the idea of a toddler with a marker, stick with crayons!

Abbey loves it! She'll usually trace a few lines, and then move on to scribbles, but that's fine with me.

Total proud mommy moment: She only had help with one of these lines! On her first try!
Pretty darn good if you ask me! My daughter is a genius!

I think this one is a hit, how about you?


Friday, October 28, 2011

Tutorial: Last Minute Trick-Or-Treat Tote

Abbey wants nothing to do with dressing up for Halloween this year. Hooray for 2-ness! We have a huge bag of hand-me-down costumes, and so far we've gotten her to put on one, for a few minutes. I think the costume of choice this year is going to be whatever we can get her to put on for long enough to take pictures! haha!
I had plans for a homemade costume, but between the tightness of our budget and the pickiness of our toddler, that didn't happen. However, I didn't want Halloween to pass without something homemade, so I got to thinking.  Since the quiet book, I have a serious love for felt. It's cheap, it comes in a million colors, and it doesn't fray! LOVE!
I dug through my basket of felt, and found an orange piece and a green piece. Perfect for a pumpkin! 

While I am totally OK with Abbey going trick-or-treating, I am not OK with a huge candy stash because, let's face it, I'm going to eat most of it anyway. That and a small treat bag self-limits the trick-or-treating.
 "Oh, the bag is full? Time to go home!"
This bag is just big enough to hold a good size stash, and just small enough to take us up and down the street...once.
Here's how I did it:

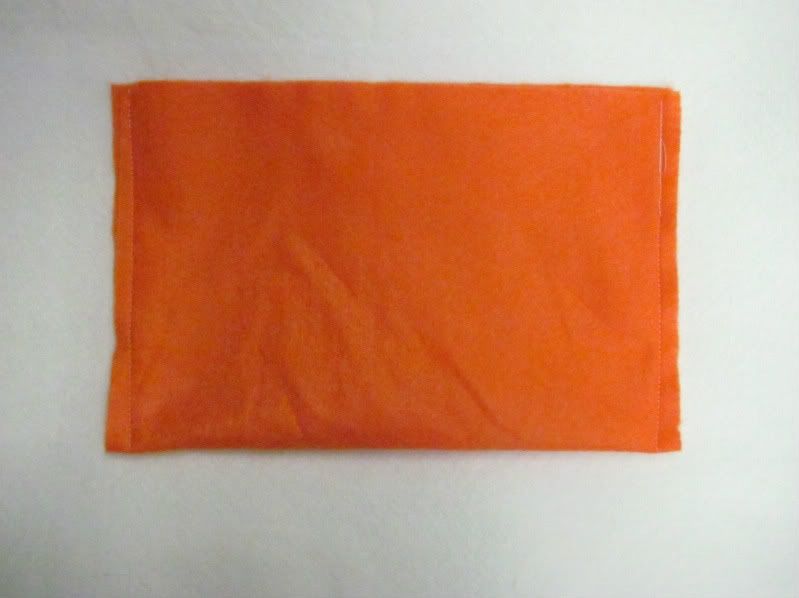
I started out by folding my orange piece of felt in half, and stitching up the sides.
This picture should be horizontal. Blogger has decided it needs to be vertical.
Thanks for that.

Then I turned my pocket into a boxy-bag (yes, that is the technical term) by sewing up the corners.
If you don't know how to do this, its super easy. Simply fold your corners, and sew a line perpendicular to your seam. The further in you go, the "boxier" your bag will be. Mine are about an inch in.

That left me with this:

Now I cut out some leaves. I just folded my green felt in half and used my rotary cutter to cut out some leaf type shapes along the edges.

These then got pinned around the edge of the bag like so:
Complicated, I know. I'm really pushing the boundaries of sewing technique here.

I stitched around the top of the bag, and added a little handle.
Voila! An adorable trick-or-treat tote!

Is it perfect? Nope. Is it going to get used for anything other than play time after Monday night? Nope! 
This bag took me maaaybe 20 minutes, including stopping and taking pictures. I love projects like this! Who doesn't love a little instant gratification, huh?

Happy Halloween, everyone! Stay safe!

This project is linked up at Tatertots and Jello,I Heart Naptime, and Boerman Ramblings


Like it? Share it!

LinkWithin

Related Posts Plugin for WordPress, Blogger...