I am so excited to be sharing this project! This has been a dreamed about project for months, and I finally pulled together the motivation to put it all together! It's amazing what an impending 7 hour car ride will do for you! I think was intimidated by all the prep work, but I ended up finishing the book in a matter of hours, spread out over about a week. I could have done it in a weekend, if I really focused.
So, without further ado, I present to you....
The Quiet Book
If I could do any page over, it would be this one. The letters were difficult to sew, and some just didn't hold their shape. I think I would use fusible interfacing instead. But, Abbey can still match the letters up, so that's what matters, right? The storage pocket was super simple. I just cut a rough square out, cut it into two pieces, and overlapped them when I stitched it on. It acts like a little envelope, and is perfect!
Abbey loves this one. Lots of fun, with a dash of copyright infringement thrown in there. All the pieces are stored in that red pocket. I thought about making this a one pager and storing all the pieces inside his body like the real toy, but I eventually plan on making more pieces, so I wanted to make sure they would all fit. I found the templates for all the pieces
HERE at Oopsey Daisy. Check out the books she made, she's got some super cute pages!
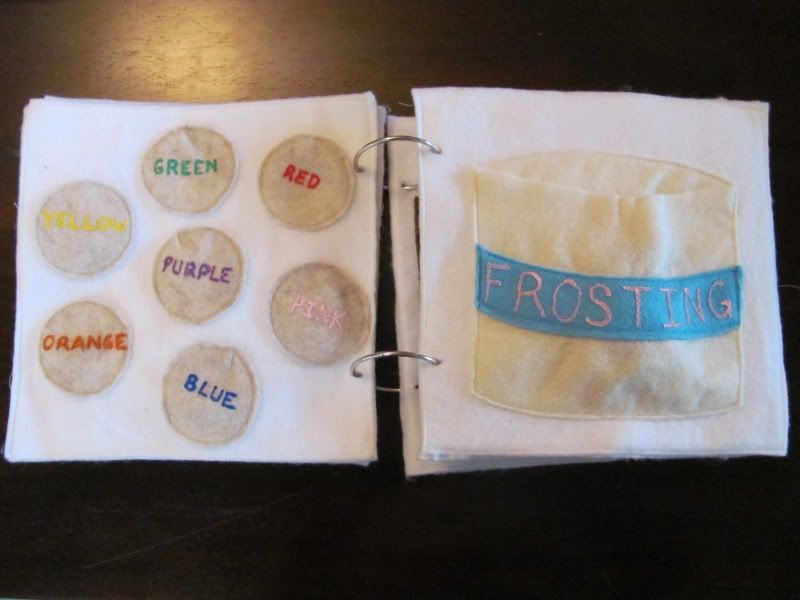
I'm so happy with the way this one turned out. Abbey knows her colors, so I wanted something just a step above simple color matching. I figured that by writing the name of the colors on each cookie, she's getting some literacy clues thrown in there.
There is a coordinating frosting for each cookie. She can also decide if she wants them to have sprinkles or not. I'm pretty sure they always have sprinkles! No patterns for this one. I traced a cup for the cookies, and drew the can of frosting myself (I'm so proud!)
I think this page is my favorite! I got the template for the doll and the clothes
HERE at Serving Pink Lemonade. She has some adorable templates! I'm planning on making the barn soon...maybe for Christmas?
How cute are those little clothes? These templates were easy to cut, and easy to sew together. Each dress and shirt are decorated on one side, and plain on the other. I like giving Abbey options. She doesn't really care about that now, but hopefully it will extend the usefulness of pages like this.
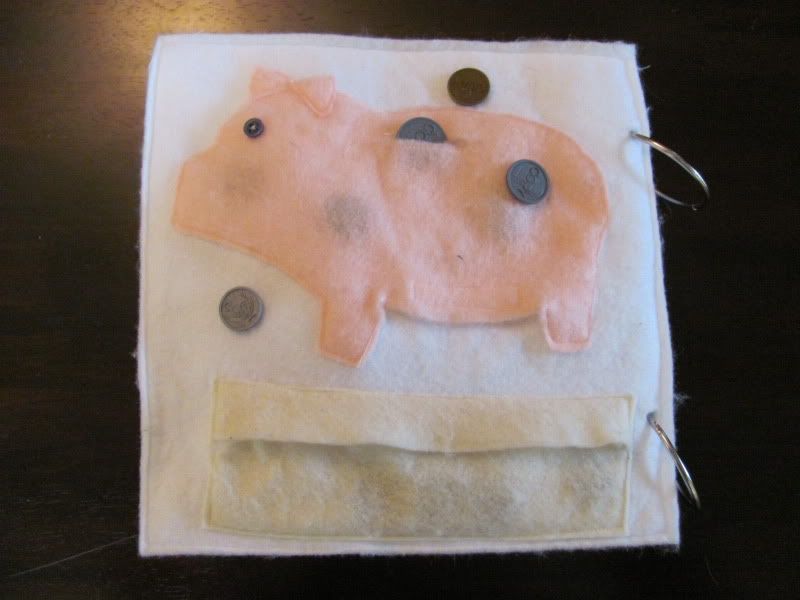
I'm so proud of this piggy bank...you have no idea! I drew him myself, which took several tries. He's got a button hole on top, and a velcro strip on his belly so that the money can go in and out. I also included a little pocket on the bottom. It's just like the one on the first page. He was inspired by
THIS page, which I think comes from a pattern for an entire book you can purchase somewhere. It also inspired the dress-up doll's suitcase.
In case you were wondering...dollar store coins are NOT legal tender:
hahaha...really?
The Details:
I made my book out of Pellon, as recommended by Serving Pink Lemonade. This is the thick non-fusible Pellon, and I found it behind the cutting counter at JoAnn's. It's not very expensive at all. I bought several yards of it before I knew the exact details of my book.
My pages are 9x9. I wanted something that was large enough for little toddler hands, but small enough to stay on her lap in the car. This worked out perfectly!
All of my page pieces are stitched directly onto the page. My play pieces are all two pieces of felt sewn together. I liked the strength this provided. One layer of felt would probably be fine, but these can be shoved in the pockets without getting all wrinkled. I used the cheapo polyester felt from the craft store.
Everything, and I mean EVERYTHING is sewn with plain white thread. There was no way I was going to change out my thread and bobbin a bajillion times. Let's face it, I wanted this book to actually get done. I was worried that it would bother me, but since everything is edged in white, it all looks pretty uniform.
My pages are sewn together back to back. I like this because when Abbey out grows a certain set of pages, I can just un-pick the seams and replace it with a new page. This also allowed me to sew my pieces directly to the page. I'm sure you could get more bang for your buck and use fabric glue, allowing you to use both sides of your page, but Pellon is pretty cheap, so I wasn't worried about it.
I chose not to use velcro. I've seen it in several quiet books, but I just thought that it would end up ultimately damaging all the felt. The pieces stick together just fine, even in the car.
I was planning on using grommets for the binder ring holes, but the Pellon is pretty tough stuff. Grommets would also prevent me from taking pages apart, which I didn't want.
When I was choosing these pages, I was worried that they didn't leave much room for Abbey to grow. I didn't want anything too easy, but I didn't want anything over her head either. My 4 year old nephew played with this book the other weekend, and he loved it too! Hooray!
I am thrilled with the way this book turned out. It was not the massive undertaking that I thought it would be, and Abbey loves it. I have plans for more pages, so keep an eye out for those over the next few months!